How to Use Smart Tags in OptinMonster
The latest trend in the e-commerce World is to create personalized messages for customers.
You can achieve this with dynamic replacement text in your pop-ups and online messages – they are a great way to attract customers and increase conversions.
Dynamic tools such as Smart Tags from OptinMonster allow you to create customized pop-ups and messages for your visitors increase sales according to most research.
The Downside?
Many of these personalization tools for pop-ups and inline messages are pricey.
That’s why I was so happy to hear about the Smart Tag feature from OptinMonster. It allows business owners to produce content unique to each visitor based on previously stored data.
Read on for all the details and how to tutorial.

This post contains affiliate links. Please read my Disclosure for more information. I was compensated for this post.
RELATED POSTS
How to Boost Conversions Like Crazy with OptinMonster Spin to Win
Boost Sales With Countdown Timer Popups
How Dynamic Text Replacement Works
Dynamic text replaces adds in personalized content to your website pop-ups and visitor messages. You can add your reader’s name, city, or country. Other options include dates and days of the week to customize your message.
Personalized messages are a great way to catch your readers eyes and to keep them on your site for longer – thus increasing your chances of a sale.
Most of us are familiar with merge tags from email. Most companies add them to their newsletters and promos in order to create a warm and closer relationship with their potential customers.
Using merge tags on your website in just the same way as you use them in your email marketing campaigns, you can create personalized pop-ups for your readers.
The OptinMonster Smart Tag feature allows you to add merge tags to your content in minutes. Below you will find a tutorial on how to get started with this amazing and easy to use feature of OptinMonster, the top lead generation plugin.
What kind of merge tags can you use?
You can personalize almost anything from date or day of the week; city, state, zip code, or country.
This is great if you want to personalize the shopping experience for your visitors by addressing them by name, for example.
Studies have shown that personalized shopping experiences lower cart abandonment rates and increase conversions.
How to Use Smart Tags in OptinMonster
If you are interested in personalizing the content you serve on your site, OptinMonster smart tags are an easy way to get started,
Note that you need an OptinMonster pro plan in order to use this feature.
It is really easy to start using Smart Tags and you can be up and running really quickly. Read on for the full instructions.
-
Create a new campaign in OptinMonster
-
Add or edit a text element in the campaign builder.
-
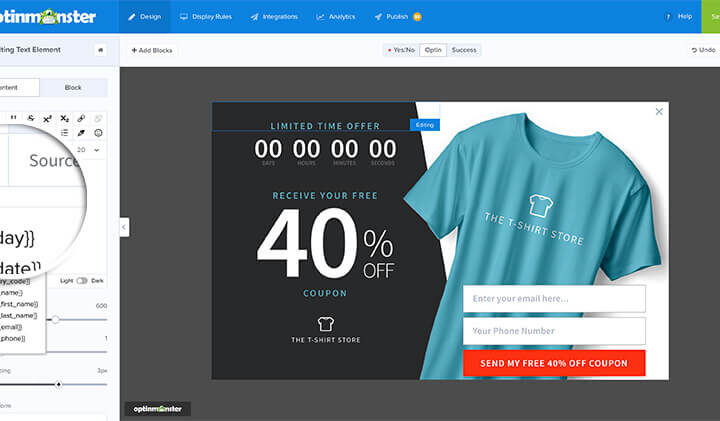
Edit your Text Element and click “{ }” button to autopopulate the smart tags.

4. Choose the Smart Tag you want to use for your campaign
5. The Smart Tag will automatically be added to your element.
6. Choose a fall-back default tag
7. Save your changes
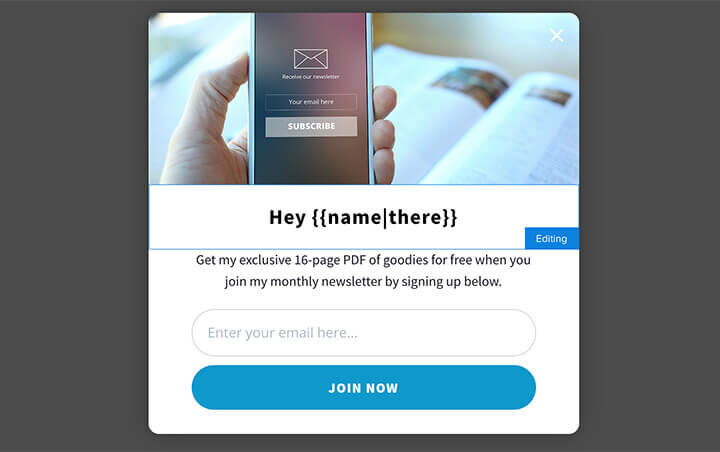
Here is how a Name tag merge will look:

Examples of Smart Tags
{{SMART_TAG_NAME}} – Smart Tag format.
{{city}}: The visitor’s city
{{day}}: The current day of the week
{{form_first_name}}: The first name submitted in the name field
How To Create A Smart Tag
If you want to go a step further, you can create your own Smart Tags using any data you wish. This is an option to go beyind the standard Smart Tags that are available as a default.
Note that this is an advanced feature and support is currently not available from OptinMonster for custom tags.
Smart Tags are made up of two opening curly braces {{ and two closing curly braces }}.
Smart Tags support 3 different methods of defining custom data (in order of priority):
- Query Argument
- Cookie
- JavaScript Variable (advanced)


